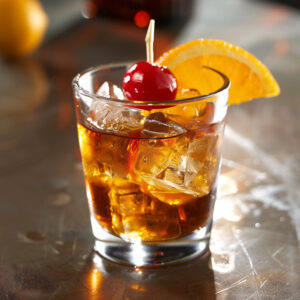
The roaring 20s in the United States wasn’t just about flappers and jazz; it was a time when mixology hit its stride as well.
Prohibition, which banned the production, importation, transportation, and sale of alcoholic beverages, led to a surge in creative concoctions that masked the taste of bootlegged spirits.
These drinks, often served in hidden speakeasies, are not only part of cocktail history but are still enjoyed today.
In this homage to the drinks of the ’20s, we’re taking a sip from the past to discover the 10 iconic cocktails that defined an era.
Table of Contents
The Mint Julep
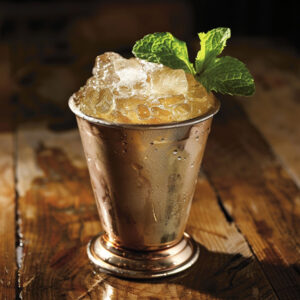
Beginning our list with a Southern classic, the Mint Julep is more than just a drink; it symbolizes hospitality and leisure.
Made with bourbon, sugar, water, and fresh mint, this cocktail was enjoyed long before Prohibition and became even more popular as a daytime drink during the dry law.
Its refreshing taste and association with prestigious events like the Kentucky Derby have cemented it as a timeless classic.
A Brief History of The Mint Julep
Dating back to the 18th century, the Mint Julep was a favorite in the bourbon-producing South.
It was first prescribed as a “morning after” tonic, a far cry from the savory delight it’s known as today.
During Prohibition, its sugary sweetness helped to conceal the harshness of illicitly distilled spirits.
Today, it’s a staple in high-end bars and a must-have at the Derby, where the masses and the elite alike sip it.
How to Make The Mint Julep
Crafting the quintessential Mint Julep is an art form requiring precision and care, befitting its storied history. Here is a step-by-step guide to creating this iconic cocktail:
- Prepare Your Ingredients: You’ll need 2 ounces of high-quality bourbon, ½ ounce of simple syrup, approximately 8 mint leaves, and extra mint for garnish. Don’t overlook the importance of using fresh mint—it’s what gives the drink its signature freshness.
- Muddle The Mint: Place the mint leaves and simple syrup into a sturdy glass. Muddle them together gently, just enough to bruise the mint leaves and release their essential oils. Over-muddling can make the drink bitter, so a light touch is critical.
- Add Bourbon: Pour the bourbon into the glass—quality matters here; the better the bourbon, the better the drink.
- Stir and Chill: Fill the glass with crushed ice and stir until the drink is well-chilled. This is crucial, as the icy temperature is a defining feature of the Mint Julep.
- Garnish and Serve: Add more crushed ice to form a dome at the top of the glass. Garnish with a sprig of fresh mint, ensuring it’s close enough to be appreciated with every sip, enhancing the drinking experience with its aromatic properties.
Serve immediately and enjoy the Mint Julep’s refreshing qualities, a drink that captures the essence of the Prohibition era with every taste.
The Sidecar
A sophisticated blend of brandy, orange liqueur, and lemon juice, the Sidecar boasts a delightful tangy profile that stands the test of time.
This cocktail’s precise origin is debated, with claims from London, Paris, and New Orleans.
Regardless of its birthplace, it reflects an era where luxury and elegance were sought creatively, particularly in concealing the alcohol’s flavors.
Dissecting The Sidecar’s Origins
Some stories credit the creation of the Sidecar to an American army captain in Paris during World War I.
Others suggest it was a hangover cure from a frequenter of a Parisian bar.
Wherever it may have originated, the Prohibition era saw it as a refined cocktail favored by the upper crust.
The use of orange liqueur likely served to ‘sweeten the deal’ of black market brandies from that time in history.
How to Make The Sidecar
Mastering the Sidecar demands a balance of sharp precision and a keen understanding of flavors emblematic of its illustrious background. Follow these definitive steps to craft this timeless cocktail:
- Gather Your Components: Acquire 2 ounces of fine brandy, ¾ ounces of high-quality orange liqueur, and ¾ ounces of fresh lemon juice. The excellence of your ingredients directly influences the caliber of the final cocktail.
- Combine and Shake: In a cocktail shaker, unite the brandy, orange liqueur, and lemon juice. The key to a refined Sidecar is in the vigor of your shake; a thorough and brisk shake integrates the ingredients flawlessly while chilling the mixture to perfection.
- Strain and Perfect: Strain the concoction into a cocktail glass. For an added touch of sophistication, consider rimming the glass with sugar before pouring. This enhances the cocktail’s visual appeal and introduces a subtle sweetness that compliments the beverage’s tangy complexity.
- Garnish and Serve: A simple yet elegant lemon twist garnish crowns this classic. Place it on the rim or float it atop the drink to introduce an aromatic citrus note, elevating the cocktail’s sensory experience.
Execute these steps with precision, and you will have crafted not just a cocktail but a piece of history—The Sidecar, a testament to skillful mixology and a nod to a bygone era of clandestine glamour.
The Mary Pickford
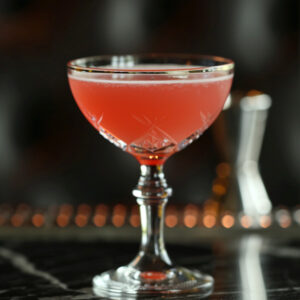
Imbued with the charm and grace of the silent film star it’s named after, the Mary Pickford cocktail combines white rum, pineapple juice, grenadine, and a splash of maraschino liqueur.
It’s a sweet and fruity concoction that epitomizes the carefree and glamorous spirit of the 1920s.
Named after the Canadian actress and co-founder of United Artists, this cocktail was at the pinnacle of Hollywood’s Golden Age.
The Hollywood-Flavored Mary Pickford
Inspired by the sweet portrayal of innocence and glamour by Ms. Pickford on screen, this cocktail sought to encapsulate her image in a glass.
Its creation during the Jazz Age was no coincidence; it was an offering from Cuba’s El Floridita bar, coinciding with Cuba’s renewed ties with America as a tropical paradise for thirsty travelers.
How to Make The Mary Pickford
To create the Mary Pickford cocktail, a symbol of Hollywood’s golden era, approach with a mixologist’s precision and an aficionado’s passion.
The procedure is elegantly simple, yet the outcome is dazzlingly complex. Follow these steps to embody the essence of 1920s glamour in your drink:
- Select Premium Ingredients: Gather 2 ounces of premium white rum, 1 ounce of fresh pineapple juice, a quarter ounce of grenadine, and a quarter ounce of maraschino liqueur. Choosing quality ingredients is fundamental to achieving the desired authenticity and flavor profile.
- Mix with Expertise: In a shaker filled with ice, combine the white rum, pineapple juice, grenadine, and maraschino liqueur. The precision in measurement and the quality of ingredients are crucial to capturing the cocktail’s signature blend of sweetness and complexity.
- Shake Vigorously: Ensuring the components are thoroughly mixed and chilled, shake the concoction with confidence. This integrates the diverse flavors and brings the cocktail to its ideal icy temperature.
- Strain and Garnish: Strain the mixture into a chilled cocktail glass. Garnishing with a cherry or a pineapple wedge adds a visual and flavorful finishing touch that pays homage to the cocktail’s tropical origins and its namesake’s elegance.
- Serve with Panache: Present the Mary Pickford with the understanding that you are not merely serving a cocktail but an essential piece of cultural history. Its creation is a nod to the timeless charm of its era and the enduring allure of its namesake.
Please take these steps with the knowledge that in creating the Mary Pickford, you are crafting more than a cocktail; you are reviving a legend.
The Bee’s Knees
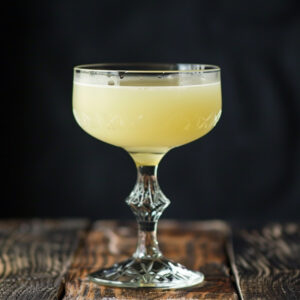
The Bee’s Knees is a Prohibition-era cocktail that is as delightful as its peculiar name suggests.
Hailing from the days when jazz slang flavored barroom conversations, this simple yet refreshing mix of gin, honey, and lemon juice was a favorite among those who appreciated a drink that wasn’t too ‘harsh’ on the palate yet packed a buzz.
The Bee’s Knees and Its Era of Slang and Defiance
The phrase “the bee’s knees” was a popular 1920s colloquialism for “the best.”
Its use in the cocktail’s name speaks to the tongue-in-cheek rebellion of the era’s illicit imbibing.
The gin in this cocktail was often of dubious quality because of the clandestine nature of its production, so the honey and lemon played a crucial role in making it palatable.
How to Make The Bee’s Knees
Perfecting The Bee’s Knees is an exercise in balancing the simplicity of ingredients with the complexity of taste.
This cocktail embodies the spirit of the Prohibition era, requiring not just an adherence to tradition but an understanding of how to elevate simple components into an extraordinary drink.
Here’s how to masterfully craft The Bee’s Knees:
- Prepare Your Ingredients: Begin by sourcing 2 ounces of the finest gin, as this will form the backbone of your cocktail. Pair it with ¾ ounce of fresh lemon juice for a citrusy zing and ½ ounce of honey syrup to round out the flavor profile with a touch of sweetness.
- Combine with Precision: In a mixing glass, combine the gin, lemon juice, and honey syrup. The quality of your ingredients and the accuracy of your measurements are pivotal, underscoring the cocktail’s refined simplicity.
- Shake with Purpose: Fill your shaker with ice and pour in the mixture. Seal the shaker and shake vigorously for about 15-20 seconds. This crucial step chills the cocktail and ensures the honey syrup is seamlessly blended, avoiding any unwanted separation.
- Strain and Serve: Strain the concoction into a chilled cocktail glass to ensure a smooth texture. The act of straining is not just about aesthetics; it’s about maintaining the integrity of the cocktail’s velvety, soft finish.
- Garnish with Intent: Finally, garnish with a lemon twist. This isn’t merely for decoration – the essential oils released from the lemon peel add an aromatic layer, enhancing the cocktail’s sensory experience.
By meticulously following these steps, you not only create The Bee’s Knees but also pay homage to a time when crafting a cocktail was an act of defiance and creativity. This drink isn’t just a testament to the ingenuity of those who first mixed it; it’s a celebration of how expertly executed simplicity can result in something truly spectacular.
The French 75
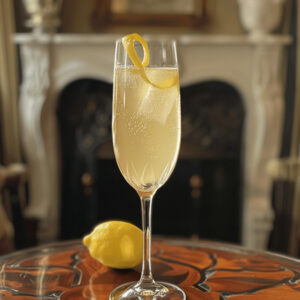
With a name that nods to the powerful World War I artillery, the French 75 cocktail isn’t just potent in name.
Combining gin, champagne, lemon juice, and sugar, this effervescent libation packs a punch with a touch of class and a dash of fortitude.
It’s a toast to the era’s resilience and joie de vivre, best enjoyed with a touch of sparkle and a twirl of history.
Saluting The French 75
The history of the French 75 aligns closely with the gin craze that marked the Roaring Twenties.
Champagne, though often hard to come by, was still the beverage of choice for the elite, and the French 75 offered them a way to enjoy a bit of luxury.
Its association with the end of World War I and the flamboyant fashion of the time made it an instant hit, labeling it as the aristocracy’s drink of choice.
How to Craft the French 75
Creating the French 75 requires a blend of precision and flair, marrying the robust flavors of gin with the elegance of champagne. It’s a cocktail that celebrates extravagance with every sip, demanding your utmost attention to detail. Here’s the step-by-step guide to mastering this classic:
- Select Premium Ingredients: Begin with 1.5 ounces of fine gin as your base. Add ¾ ounce of fresh lemon juice for a crisp, citrusy edge and 2 teaspoons of sugar to balance the tartness. The choice of high-quality gin and champagne cannot be overstated; it’s the foundation of the French 75’s luxurious profile.
- Combine and Shake: In a cocktail shaker, mix the gin, lemon juice, and sugar. Fill the shaker with ice, sealing it to ensure no spillage. Shake vigorously, allowing the cold to mellow the sugar’s sweetness and blend the flavors harmoniously.
- Prepare the Glass: Choose a tall, slender flute to showcase the cocktail’s elegance. This choice isn’t merely about presentation; the shape of the glass enhances the effervescence and aroma, culminating in a heightened tasting experience.
- Pour and Top Up: Strain the shaken mixture into the prepared flute, taking care not to disturb the calm of the liquid. Top the glass with a generous pour of chilled champagne. This isn’t just adding fizz; it’s an invocation of celebration, transforming the drink into a festivity in a glass.
- Garnish with Grace: A twist of lemon peel adds a final note of citrus and serves as a visual flourish, signaling the care and attention dedicated to the drink’s creation.
In crafting the French 75, you partake in a ritual of elegance and enjoyment. Each step, performed with precision and care, underscores the cocktail’s storied past and its continued legacy in the annals of classic mixology.
The Southside
One part lemon juice, two parts gin, a dash of sugar, and a sprig of mint—the Southside cocktail has all the makings of a mojito’s confident and cool older sibling.
A favorite among rumrunners and gangsters, this gin-based cocktail was less about refreshment and more about enjoying spirits that were otherwise hard to come by.
Southside Chronicles: Into the Heart of the Speakeasy
Originally created in the Southside of Chicago, the cocktail is rumored to have been a favorite drink of Al Capone, which gave it a notoriety that lasted well beyond the 1920s.
The mint and sugar complemented the homemade gin’s harshness, making it a smooth, sippable drink that quickly found a following beyond the Windy City, becoming one of the staples of the speakeasy scene.
Crafting the Southside with Mastery
Bringing to life the Southside cocktail demands respect for its storied past and meticulous attention to detail in the present. Here’s how to execute this classic with precision:
- Select the Finest Ingredients: The foundation of any outstanding Southside begins with 2 ounces of premium gin. Ensure the gin has a balanced botanical profile to complement the cocktail’s other components. Include ¾ ounce of freshly squeezed lemon juice for its crisp acidity and ½ ounce of simple syrup to introduce a smooth sweetness that balances the tartness of the lemon.
- Incorporating Fresh Mint with Intention: Take a handful of fresh mint leaves—about 4 to 6, depending on size—and gently press them in the palm of your hand. This action is to awaken the mint and release the essential oils and aroma without bruising the leaves. Add them to the shaker to infuse the drink with the mint’s invigorating essence.
- Shake with Vigor: Combine the gin, lemon juice, simple syrup, and pressed mint leaves in a cocktail shaker filled with ice. Seal tightly and shake with determination for about 15-20 seconds. This vigorous shaking is critical to integrating the mint’s flavor while ensuring the mixture achieves an optimal chill and dilution.
- Strain with Precision: Strain the mixture into a chilled cocktail glass through a fine mesh strainer. This step is crucial to catch any mint leaves and ice chips, presenting a smooth and pleasing drink to the palate.
- Garnish with Elegance: Garnish with a mint sprig, lightly tapped between your hands to release its aromatic qualities. Position it strategically atop the drink as a decorative element and an olfactory garnish, complementing the cocktail’s multifaceted flavors.
Mastering the Southside is an art, combining the precision of mixology with the grace of serving. Each step, performed carefully and confidently, celebrates the cocktail’s rich history while delivering a refreshingly modern experience.
The Corpse Reviver #2
“Don’t Die,” says the tagline of this peculiarly named creation.
A combination of gin, Cointreau, Lillet Blanc, lemon juice, and a dash of absinthe, the Corpse Reviver #2 wasn’t just enjoyed as a pick-me-up; it was intended as a hangover cure.
This proves that craftiness wasn’t exclusive to prohibitionists even in the Prohibition era.
Resurrecting Your Spirits: The Story of Corpse Reviver #2
The Corpse Reviver cocktail family was initially intended to do precisely what the name suggests—revive the deadened spirits after a night of overindulgence.
The Corpse Reviver #2, however, gained popularity for its restorative powers and delectable flavor profile.
It has been one of the few alcoholic drinks that called for absinthe, which, paired with the other ingredients, created an intriguing and potent mix.
Mastering the Corpse Reviver #2: A Step-by-Step Guide
To craft the Corpse Reviver #2 with the finesse it deserves, assemble all necessary components precisely. This honors its esteemed legacy and ensures each sip delivers the promised revitalization.
- Curate the Ingredients: Begin with equal parts—3/4 ounce each—of high-quality gin, Cointreau (for a touch of orange zest), Lillet Blanc (for a smooth, wine-based complexity), and freshly squeezed lemon juice (for a sharp, refreshing acidity). Add a dash of absinthe to impart a subtle layer of herbal mystique to the cocktail.
- Chill the Glass: To elevate the experience from the first touch, chill your cocktail glass in advance. This simple step transforms the drink into a refreshing elixir, invigorating the senses before the first sip.
- Combine with Precision: In a cocktail shaker, mix the gin, Cointreau, Lillet Blanc, and lemon juice. The exact ratio is crucial—striking the right balance ensures a harmonious blend of flavors that’s both invigorating and smooth.
- Invigorate with Ice: Fill the shaker with ice, seal firmly, and shake vigorously. This not only cools the drink but also dilutes it slightly, softening the edges of the alcohol to reveal a more refined taste.
- Prepare the Absinthe: Add a dash of Absinthe to the chilled glass. Swirl it around to coat the inside of the glass, then discard any excess. This method infuses the drink with absinthe’s distinct anise flavor without overwhelming the delicate balance of the other ingredients.
- Strain and Serve: Strain the shaken mixture into the prepared glass. The absence of ice in the serving glass ensures a potent, undiluted flavor profile, true to the spirit of the Corpse Reviver #2.
- Garnish with Intent: Accent the cocktail with a simple garnish, such as a cherry or an orange twist. This adds visual appeal and introduces a subtle aroma that complements the drink’s complex flavors.
In mastering the Corpse Reviver #2, you engage in a time-honored tradition of craft cocktail making. Each step, executed with authority and care, brings to life a drink that’s as storied as it is spirited. Enjoy responsibly, respecting its potency and historical significance.
The Hanky Panky
Conceptualized by Ada Coleman, the first female bartender at the Savoy, the Hanky Panky cocktail isn’t just an alliteration; it’s a masterpiece.
Comprising gin, sweet vermouth, and a few dashes of Fernet-Branca, this complex libation is an ode to the wit and sophistication of its creator and to the gin-joint culture that revered it.
Mystery and Sophistication in The Hanky Panky
Coleman crafted this cocktail as an experiment, seeking to satisfy the palate of a demanding customer.
The result was the Hanky Panky—a drink that balances the sweetness of vermouth with the bitter complexity of Fernet-Branca, courtesy of a hint of the dark elixir.
The Hanky Panky’s revival in recent years has been a nod to the vast depth of flavors that emerged from the clandestine mixology of the Prohibition era.
Crafting the Hanky Panky: A Mixologist’s Guide
To create the Hanky Panky, a cocktail as enigmatic as its name suggests, one must approach the task with the precision and expertise worthy of Ada Coleman’s legacy. This drink is not just a concoction but a testament to the sophistication and depth of early 20th-century mixology.
- Select the Ingredients: Begin with the foundation of the cocktail—1 1/2 ounces of gin for its botanical sharpness, matched with 1 1/2 ounces of sweet vermouth to introduce a velvety richness. The pivotal ingredient, however, is the Fernet-Branca. A mere two dashes will suffice to impart its distinctive, herbaceous bitterness, creating a unique flavor profile that is the Hanky Panky’s signature.
- Stir with Purpose: Unlike the vigorous shaking of many cocktails, the Hanky Panky demands a gentler approach. Combine the gin, sweet vermouth, and Fernet-Branca in a mixing glass filled with ice and stir. This method ensures a silky-smooth texture, allowing the flavors to meld perfectly without diluting the spirit of the ingredients.
- Strain to Perfection: Strain the mixture into a chilled cocktail glass. The elegance of this cocktail is in its clarity and smoothness, ensuring that each sip delivers the complex interplay of flavors with unadulterated grace.
- Garnish with Intent: A twist of orange peel serves as the final flourish, releasing a delicate citrus aroma that lingers with each sip. The garnish is not merely an ornament but a critical component that enhances the drinking experience, echoing the nuanced craftsmanship of the Hanky Panky.
The Hanky Panky cocktail, with its rich background and exquisite blend of flavors, underscores the artistry at the heart of mixology. Crafting this drink is not just about following steps but engaging with cocktail culture’s history and complexity. It is a task that demands respect, precision, and a deep understanding of the ingredients’ interplay, producing a beverage that’s as captivating as its name.
The Old Fashioned
Certainly living up to its name, the Old Fashioned proves that the simplest things can often be the best.
A mixture of muddled sugar with bitters, water, and spirits, this straightforward cocktail of choice for Don Draper and many others captures the essence of a bygone era when cocktail culture was refined to a few timeless classics.
Unraveling The Old Fashioned’s Past
The origins of the Old Fashioned are thought to date back to the early 19th century, merely undergoing a revival during Prohibition.
Originally served in silver or pewter mugs, it began as a way to enhance the flavor of lower-quality spirits.
However, the Prohibition era saw it evolve into a style statement, with drinkers often requesting their spirit of choice to be served “the old-fashioned way.”
Crafting the Old Fashioned: A Timeless Technique
The Old Fashioned represents not just a drink but a tradition that demands attention to detail and an appreciation for the classics. To craft this iconic cocktail, follow these meticulously refined steps:
- Sugar and Bitters: Start with a single sugar cube placed directly in the old-fashioned glass. Saturate this cube with two to three dashes of Angostura bitters; this is the heart of the cocktail, providing a depth of flavor that is both sharp and complex. Add a splash of water to help dissolve the sugar cube.
- Muddle with Precision: Using a muddler, gently crush the sugar and bitters together until the sugar is fully dissolved. It’s essential not to rush this process—the goal is to create a smooth base without any granulated texture.
- The Spirit: Pour 2 ounces of your preferred high-quality bourbon or rye whiskey. The choice of spirit is crucial, as it defines the backbone of your Old Fashioned, lending its distinctive character to the melding flavors.
- Ice with Intent: Add large ice cubes to the glass. The size and quality of the ice matter, as smaller cubes melt faster, leading to over-dilution. Larger cubes maintain a slow, even chill, preserving the potency and flavor integrity of the drink.
- Stir to Perfection: Stir the concoction gently for 30-40 seconds. This not only chills the drink but also ensures a harmonious blend of the whiskey with the sweetness of the sugar and the aromatic complexity of the bitters.
- Garnish with Eloquence: Top off the cocktail with a twist of orange peel and a cocktail cherry, if desired. The garnish introduces a final layer of aroma and subtle flavor, completing the sensory experience of the Old Fashioned.
Executing these steps with skill and precision elevates the simple act of cocktail-making into a form of art. The Old Fashioned, with its rich heritage and simple elegance, embodies the essence of classic cocktail culture, proving that true sophistication lies in mastering fundamentals. Enjoy this timeless drink, savoring each sip as a testament to the enduring appeal of classic mixology.
The Last Word
Hiding in the shadows of obscurity, the Last Word cocktail was all but lost to history until modern mixologists rediscovered it.
A unique combination of gin, Green Chartreuse, Maraschino liqueur, and fresh lime juice, it’s a balanced mix of sweet, sour, and herbal notes that make it a fitting tribute to an era that demanded celebration.
The Modern Rediscovery of The Last Word
Named for the delight it was supposed to elicit from the consumer, the Last Word’s revival from the dead has made it a symbol of the Prohibition era’s clandestine creativity.
Its piquant and bold flavor profile has earned it a place in the cocktail pantheon of the 21st century, serving as a liquid passport to the 1920s.
Unleash the Magic: Crafting The Last Word Cocktail with Expert Precision
To master the creation of The Last Word, follow these expertly curated steps, each designed to preserve the authenticity and vibrant character of this storied cocktail:
- Measure with Precision: Begin by gathering your ingredients with exactness—3/4 ounce gin, 3/4 ounce Green Chartreuse, 3/4 ounce Maraschino liqueur, and 3/4 ounce fresh lime juice. This precise balance is critical, as the harmony between the herbal, sweet, and sour elements defines the essence of The Last Word.
- Combine and Chill: Pour all the ingredients into a shaker filled with ice. The chilling process is as important as the mix itself; it tempers the ingredients, melding them together while ensuring the cocktail remains crisp and refreshing.
- Shake to Awaken: Vigorously shake the mixture for about 15 seconds. Unlike stirring, shaking invigorates the cocktail, introducing air, reducing the harshness of the alcohol, and perfectly integrating the distinct flavors.
- Strain with Care: Strain the concoction into a chilled coupe glass. The fine strain prevents ice shards from entering the drink and ensures a smooth, clean presentation, which is paramount for a cocktail of this caliber.
- Garnish with Purpose: Finally, garnish with a lime wheel or cherry, if desired. While seemingly a small touch, the garnish plays a crucial role, adding an extra layer of aroma and a hint of flavor that complements the cocktail’s complex profile.
By adhering to these steps with the rigor and devotion they demand, you create more than just a cocktail; you craft an experience—a testament to The Last Word’s enduring allure and sophistication. Each sip celebrates its rich legacy, inviting you to savor a piece of cocktail history.
In Conclusion
These cocktails are not just historical artifacts; they remain protagonists in the modern mixology movement, adding personality to bars and curiosity to taste buds.
Their creation and popularity in the 1920s represented a collective craving for taste, rebellion, and identity in the face of adversity.
As we raise a glass to these iconic libations, we also toast to the enduring spirit that inspired their creation—a spirit that beats not just in the heart of the 1920s but in the core of every well-crafted drink today. Cheers to you, whoever said the ’20s are over!

